I remember eating dad’s apple crumble many, many times… (We grew up calling it “apple betty”, but I thought I’d call it a “crumble” to avoid any confusion.) I remember sneaking in and eating the crumbles off the top because they were the best part! I even saved the piece of paper I scribbled the recipe on probably 10 years ago. I had called him one day, craving this warm, sweet, apple goodness and he told me how he made it. Maybe I’m just sentimental like that, but I like to remember…. moments. I hope this becomes a staple in your family the way it has in mine. Simple. Easy. Good.
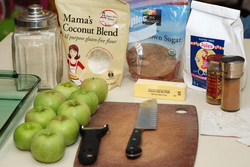
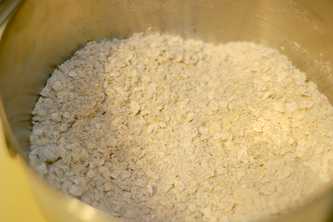
Assembled ingredients.
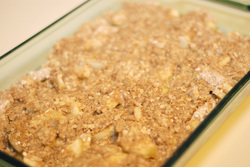
Dad’s Apple Crumble
Ingredients
5c sliced apples (more is better) 1 Tbsp flour (any gluten-free flour blend will do) 5 Tbsp white sugar (I use organic, unbleached) ½ c oats (I have Jules organic certified gluten-free instant, which I like to use for baking) ½ c brown sugar ½ c flour (any gluten-free flour blend will do) ¾ tsp nutmeg ¾ tsp cinnamon 1 stick butter (to make it dairy free, use a stick of Earth Balance)
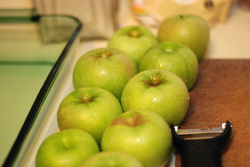
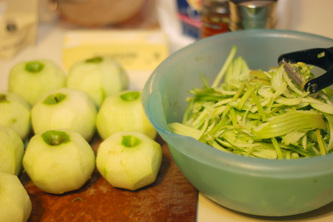
You can see I have 9 apples here. In retrospect, I could’ve used even more. The apples cook down and the more the merrier as far as I’m concerned!
Directions
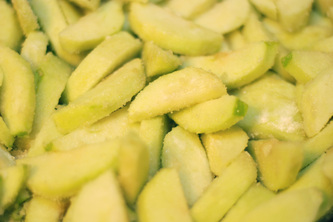
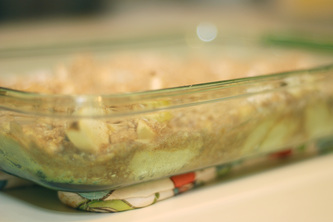
Peel and slice the apples. Spread them out in a 9×13 or 8×8 pan. The size of the pan totally depends on how much of a ratio you want of crumble to apple. I like to make it in a 9×13 so it seems to last longer! Sprinkle with flour and white sugar, mix together with a fork so the apple slices are covered.
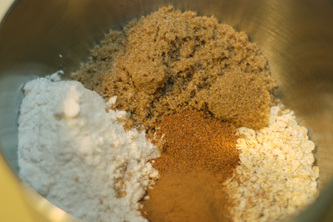
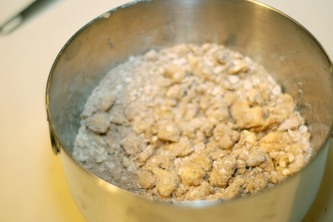
Combine oats, brown sugar, flour, nutmeg and cinnamon. Place butter on top and cut it into the mixture with two knives until the butter is in tiny clumps covered in the mixture. Pour crumble mixture on top of the apples evenly.
Bake for 30 minutes at 375. Serve hot, warm or cold, with or without ice cream. Enjoy!
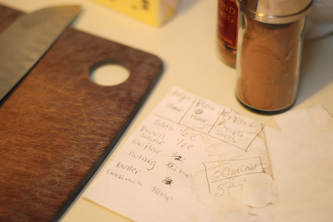
See my scribbled note, Dad? Makes me think of you!
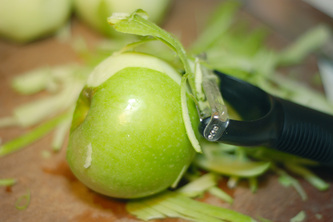
I’m not a fan of peeling apples but it’s worth it!
Do you compost? It’s a great way to keep food scraps out of landfills, allowing them to break down naturally.
I really keep meaning to write about nutrition, supplements, and health. I have so many posts I’ve started about lemon water, meal-planning on a budget and more recipes. However, my heart is leading me elsewhere and so I follow.
I say this is “Healing Disordered Eating, Part 1” because I believe there will be many more posts on this subject because disordered eating is thick and deep and intense, as are we. So, where should we start?
The first step to healing, the one that I had the hardest time taking, is kindness. Yup, kindness. To start with, kindness for oneself is so challenging and yet, isn’t it said that you can’t love others until you love yourself? I have to disagree. I have loved and continue to love deeply, though at times I have not loved myself. Let it be said, though, that as I have learned to be kind to myself, my love for others flows more freely and without obstacles. So, perhaps it should be said, you can’t love others freely until you are freely loving yourself.
I wish it was as easy as saying, “Be kind to yourself” and then we could move on, but it’s not. It’s a daily, hourly, by-the-minute practice. It takes conscious effort until it becomes your unconscious norm. Kind thoughts, kind feelings, kind words, kind actions…. Where, oh where do we start?
Let’s get one thing straight: Mean people suck. It’s true. They leave such a bad taste in your mouth and perhaps a PTSD feeling whenever you think about encounters you’ve had with them. I’ve been hurt so badly by people I’ve trusted and by complete strangers. These encounters are not easily forgotten. They shape our view of the world. Words can hurt. Period. I’m sure I’ve hurt many people as well and I am sorry that there have been times I was a “mean person”, or acted meanly. I’ve been most hurtful to myself. Perhaps you have too.
I hear stories about bullying and I cringe. How can people be so cruel? Of course this kind of cruelty is not just small town, schoolyard drama; people are fighting on social media, bullying on blogs, and just being violent and hateful in general. And so it spreads to a national and global level that makes me scared for my children, for all children. And then it just makes me angry.
Before my anxiety and frustration can run rampant, I have to bring it home and I invite you to do the same. Start with yourself. Affirmations go a LONG way. (A quick aside: I practiced an affirmation every day for a few months that stated, “I run five miles effortlessly.” At the time I started the affirmation, I was walking and jogging two to three miles every other day. A couple months in, I truly was running five miles and it was effortless. Making a long story short, it worked!) When a negative thought comes into your mind, try adding, “And I love myself.” Or say, “I am loveable.” Because you are. I know it. Some affirmations to try are the following: “I eat when I’m hungry. I stop when I’m full.” “I am beautiful, healthy and strong.” “I am kind to myself.” “I take care of myself.”
Be nice. To yourself, to others, to all. I don’t have all the answers to the cruelty that exists in the world, but I know it starts somewhere deep within, some kind of wound that festers and breeds all kinds of ugliness. So heal it. Heal deep down inside, the places that you don’t want people to see and the places that cause you to lash out at others when they get too close. The insecurities. The failures. The “I’m not good enough’s”. Speak kind words into those places.
I’m sorry if you thought this was going to be a step-by-step posting on how to cure your roller-coaster dieting or your binge eating struggles. I wish I could give that to you, but it starts deep within. It starts with kindness. That first, giant step is one that will lead you on a path of complete healing. I can almost guarantee it. When you eat something you think is “bad”, try saying, “I ate this and I am still loveable.” Step off the scale and step into your life because it’s moving forward and you deserve to live it. Stop agonizing over it. Stop bullying yourself. This kindness that your spirit so desperately needs is waiting for you. Speak it. Find it. Feel it. If you want off the roller-coaster and you want to feel comfortable in your own skin again, the exit, the starting line, the journey, and the destination are all at the same place: Here. Now.
I do offer intuitive eating coaching sessions and will continue to post Parts 2, 3, 4 and however many I come up with for this subject of disordered eating that is so near and dear to my heart. For now though, practice kindness.
Today is my 35th birthday. It’s pretty surreal actually… Getting older and all that jazz. Being a mom to two lovely babies. Being a wife to an incredible husband. Turning 35… Anyway, happy birthday to me! Today also marks another turn in my journey with food.
I gave up gluten when I was in grad school. It was a new concept to me, but as I pursued the nutrition specialty for my degree, I thought, “Maybe there’s something here.” So, I played around with giving it up and I felt better and better as time went on. Gone were the bloating, gas, cramps and unpredictable digestive upsets. Increased energy, clearer skin and regularity arrived in their place. Gluten-free became less of a learning curve and more of a way of life. I learned about gluten-free baking, flours, cookies, packaged products and how to avoid the hidden sources of gluten. I encouraged others to do the same and I have literally worked my practice around the removal of allergens, like gluten.
But I cheated. I hate to use that word, but that’s what it was. I believe in moderation. I believe in obeying cravings. Still, if I’m sensitive to a food and I eat it, I’m cheating. When I was pregnant with my first child, I was just turning the corner from vegan to omnivore and I ate no less than three burgers a week from In-N-Out (aaaah, I miss them!). I didn’t think about the gluten, I just knew I wanted a burger! I was a 90% gluten-free person. I didn’t buy it and I didn’t bring it home, but I would have a bite here and there when I was at restaurants or social events. However, pregnancy seemed to be an especially gluten-filled time.
After the birth of my second child, we discovered that she was allergic to wheat (via a blood test at nine months of age). She had low markers, but considering how little I consumed, we removed it completely from her diet and mine. It wasn’t that hard, considering how familiar I was with a gluten-free lifestyle. Still, I missed it. The occasional hamburger (with bun, from Five Guys… it’s not In-N-Out but it does in a pinch), or naan from an Indian restaurant, or just a good ol’ fashioned piece of real bread made me swoon. I continued to eat gluten-free until my daughter weaned herself at 14 months. Her eczema cleared up quickly and we went about our lives.
When she weaned, I couldn’t wait for a taste. I was so excited. I just had a little here and there and I loved every bite. Then, this summer, I started having reactions. We weren’t sure what they were from but they were serious. They involved rashes, and throat swelling, itching inside and out and extreme lethargy. Benadryl kept me out of the hospital, barely. It also exhausted me for a day or so after using it. Then I discovered HistaEze, which I HIGHLY recommend. It has none of the side effects of Benadryl and all of the necessary ingredients to stop allergies in their tracks (whether seasonal or situational). Still, we needed to know the cause. I started to have increasing anxiety about going places just in case I had another attack. With five attacks in two months, I contacted an allergist and set up an appointment.
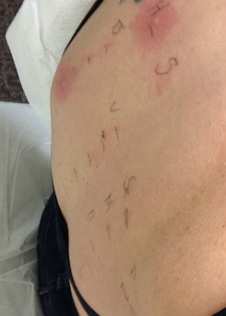
My appointment was yesterday. I had a back scratch test done and wheat flared up instantly. By the time the 15-minute wait was over, it was taking over the other tests on my back. As the allergist said, “We found our smoking gun.” Somewhere between pregnancy, nursing, giving up gluten and taking it back, wheat and my body had a horrible disagreement. The Gluten Doctors have a great blog that I read and they also agree cheating is not an option – read more here.
The red “H” up top is the histamine control and the big red dot below is wheat… after one minute.
So, I start the next year of my life armed with two epi-pens and a bunch of paperwork that basically tells me to never eat wheat again. No more splurges. No more tastes. Apparently, exposure can lead to increasingly worse reactions and I’m not up for that. No taste can compare to living a long and healthy life with my family. It’s been a torrid affair and it’s over.
Yes, I know how to live wheat and gluten free. Yes, I can help you learn too. But only time can help me say goodbye. Food is a powerful force in our lives. It’s associated with pleasure and celebration, comfort and joy. It’s okay to mourn. But it’s not okay to deny it or lie to myself about it. Like any bad breakup, it might include some wine, chocolate and a chick flick, but I’ll get through this!
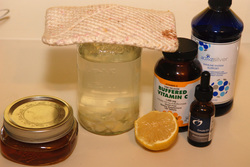
It’s so much easier to think and read about cold remedies when you’re not sick. At least it is for me! When I’m sick, I can’t even read, let alone make some fancy concoction. This is the predicament I found myself in last week when my baby girls and myself were laid out flat with really bad colds.
Oh a cold is a cold is a cold and it’s stuffy noses and coughs, right? Well, yes, but sometimes it’s debilitating. The headache, alternating runny and stuffy nose, cough and sore throat really put me down! When it hit me (Day 1), I was kind of in shock and I just sat there, guzzling water and wiping all three of our noses. On Day 2, I was feeling worse and had to be a little more proactive, taking 6,000 IU of vitamin D3 in the morning, 2,000 mg of vitamin C every few hours and 1 Tbsp of liquid silver every four hours. I continued to drink hot lemon water with honey whenever I had the energy to make it. It all seemed to take too much effort. When I woke up still feeling horrible on Day 3, I was desperate enough to raid my arsenal. I continued with vitamin C and silver, while adding garlic tea (see below) and raw chopped garlic to my food. Drinking water, juice and tea all the while, I gradually felt myself improving. By Day 4, I was out of the house, moving around and getting things done. Day 5 found me walking in a 5k with my girlfriends, thankful for my health.
So, what did I learn from this? I need to have my remedies ready to go. I need to be more prepared for the onslaught of exhaustion that might very well prevent me from creating some healing concoctions. I need to ask for help. On Day 3, when I was in tears because I had another 11-hour day ahead of me watching my sick babies and taking care of myself, I asked my husband to chop and peel garlic before he left for work. What a help! It made all the difference, having someone give me access to the things I needed to help myself.
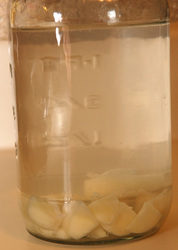
Interested in garlic tea? I learned to make this when I was pregnant and was nervous about what I could and couldn’t take for a cold. It’s very simple. Peel and cut 5-6 cloves of garlic. Pour boiling water over them (preferably in a one-quart mason jar) and cover (I use a pot holder). Let steep for about 30 minutes and drink up. Sometimes I add lemon and honey. Sometimes instead of water I use broth. I also reuse the garlic one or two more times, by refilling the jar with hot water.
I whole-heartedly attribute my quick turn-around to silver and garlic. However, there are some more things I could’ve done and want to be prepared to try in the future. I read this amazing article on Holistic Squid’s blog that gave me some great ideas! You can read the whole article here. I am going to invest in fermented cod liver oil and oil of oregano. I may also get some elderberry syrup. I’m inspired by the posts on Holistic Squid’s website and hope you’ll check them out too!
Just an aside, I can get you any of these supplements as a practitioner who works with Designs for Health. I am very particular about which supplements I recommend because the quality of supplements is not regulated; therefore you don’t always get what you’re paying for. Buying from a company that sells only to practitioners (like Designs for Health) or purchasing supplements and vitamins that are labeled GMP (Good Manufacturing Processes) is your best bet for getting the high quality necessary to make a difference.
When I met my husband, I was a raw foodist (consuming only raw vegetables, fruits and nuts). I admit a big part of that lifestyle was my need to control my food intake, to control what I consumed by limiting what I allowed myself to eat. I don’t think there’s anything wrong with raw food diets, Paleo, veganism, vegetarianism, or any of the food choices that so many people make. For me, though, it was less about health and more about control.
As I learned to listen to my body and trust my cravings, I started craving eggs. So, being the excited extremist that I am, I went out and got myself some baby chickens. My future-husband was in shock! A few weeks later I craved fish and while I didn’t go buy an aquarium, I did start incorporating it into my eating habits. Slowly but surely, I began eating fish, eggs and eventually beef. Once I got pregnant, I was eating several hamburgers a week! What a change…
Poultry and pork were foods that I didn’t crave or desire for a long time and I still don’t eat pork, but poultry I’ve eased into over the last few years. It was hard at first, after years of being a vegan, to allow myself to touch, cook and eventually eat something that I had kept out of my reach for so long. I can’t say it’s always easy. My body feels better with clean proteins in it, but my mind shudders a little at times.
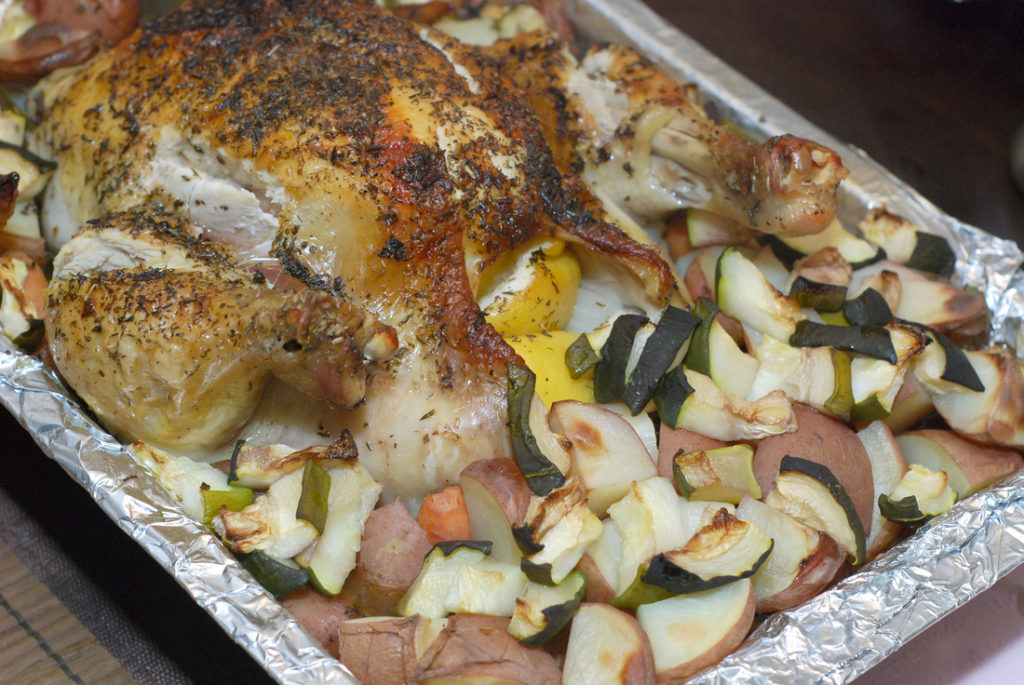
All this said, I have to find really creative and yummy ways to cook poultry in order for me to enjoy it; roast chicken is one of those ways. I wanted to share this really easy and delicious way that I prepare a chicken. It’s really easy to make and everyone loves it. Once I got past touching a raw, whole chicken, this became one of my favorite meals to prepare for my family! I hope you’ll try it and enjoy it as well.
Final note: We do not consume poultry that contains hormones or antibiotics. We don’t want to feed those to our children and I, personally, cannot stomach the conditions the chickens might be raised in. I recommend local farms, free-range, hormone- and antibiotic-free chicken only.
Easy, Roast Chicken
Ingredients:
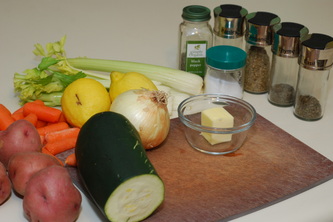
1 whole chicken 2 lemons cut in fourths 2 onions cut into chunks 4-7 potatoes chopped 3 celery stalks chopped 5 carrots chopped Any other vegetables you have on hand 4 TBSP butter melted ½ cup of wine (I prefer white, but will use whatever) 1-2 cups of water 1 TBSP oregano 1 TBSP parsley 1 TBSP sage ½ TBSP thyme salt & pepper
Directions
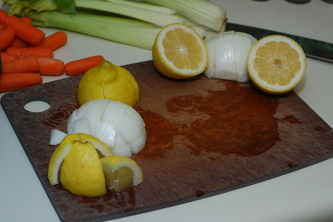
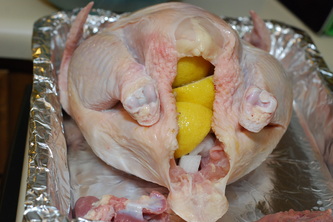
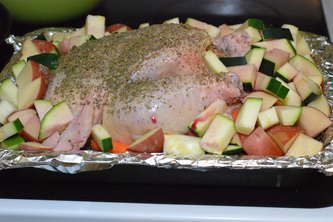
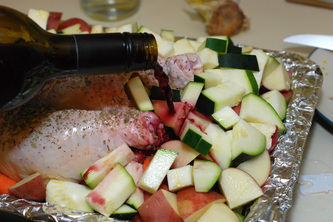
Preheat the oven to 425. Wash the chicken thoroughly and remove the insides. Immediately transfer to a roasting pan with the drumsticks pointing up. (I have a really old pan, so I line it with foil. Hope to remedy that one day.) Squeeze one of the lemon fourths all over the chicken and shove the rest of them inside with half of the onion pieces. Pour the melted butter over the chicken and arrange the other vegetables around the chicken. On this particular day, I had a huge zucchini from the garden and I added that to the array as well. Sprinkle the spices all over the chicken. Pour the wine over the vegetables and then add water to the pan – this will create a wonderful juice to pour over everything when served.
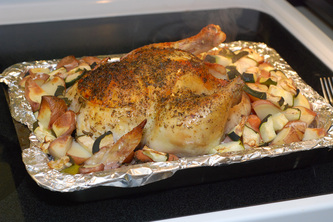
Place in the oven for one hour. At the one hour mark, baste the chicken in the liquid. I use a small ladle to do it because we don’t have a baster, but a baster would probably be easier! I’ve tried using a thermometer but it wasn’t reliable and I can tell you that it is beyond frustrating to serve dinner and find out it’s not cooked all the way! So, what I do, is cut into a breast all the way to the bone, making sure juices run clear and the meat is white. If not, return to the oven for 10-minute increments, checking each time to make sure the meat is cooked all the way through.
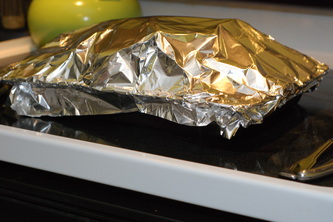
When it’s finished, set it aside for at least 10 minutes and cover with foil. Then serve! I love that it’s a one-dish meal and it comes together so quickly. Between the chicken, the potatoes and the vegetables, we don’t need anything else. It makes great leftovers and I often use the carcass to make an incredible chicken broth, but that’s a blog for another time!
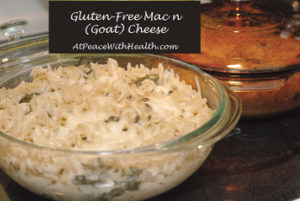
It’s time to share my favorite recipe! I call this “mac n cheese” but really, it’s so much better than that, more gourmet than that. It’s gluten-free pasta with goat cheese, spinach, onions, garlic, spices and love!
I created this recipe when I was pregnant with my first child and I had aversions to so many foods. I had a really difficult time feeding my hungry, pregnant belly when I didn’t want anything. I especially didn’t want vegetables, which, as a nutrition-phile, was frightening! So, I experienced a slight craving for pasta and I went with it. While I was making it, I decided I wanted cheese and realized I could “hide” a lot of spinach in it. My husband and I devoured this so quickly and we were so stuffed but we couldn’t wait to make it again. We ate so much of it that I began thinning the cheese mixture so that I could divide the pasta into two casserole dishes and make it last!
Warning: I am not a chef, nor am I a recipe-writer! Even when I follow recipes I’m not that great at measuring. So, I’m estimating here and if you’re uncomfortable with that, I understand! Please, use more onion and garlic if you like or make your cheese mixture thinner or thicker if that’s what you like. I’m simply and humbly passing on the general flow and creation of a meal that my family and friends absolutely love and I hope you will too!
Gluten-Free Mac n (Goat) Cheese
Ingredients:
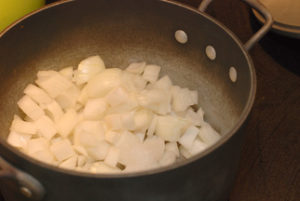
1 onion chopped
1-2 garlic cloves, chopped
1 tbsp butter (or coconut oil – if you don’t use butter)
1 11-oz log of Chevre goat cheese
1c So Delicious Coconut Milk Beverage unsweetened (or other dairy / non-dairy beverage)
1 tsp basil
1 tsp oregano
1 tsp parsley
Salt & pepper to taste
Lots of spinach (at least 2 cups)
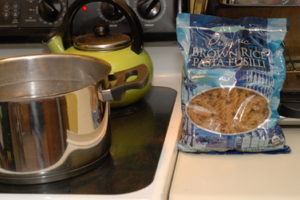
16 oz GF Pasta (I use Trader Joe’s organic brown rice pasta)
Water to boil
½ lb Cheddar goat cheese, shredded (or less)
Onions and garlic cooked with butter or oil – the foundation of many great meals!
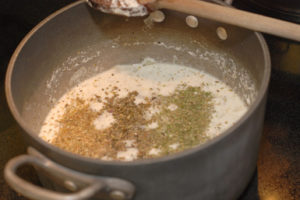
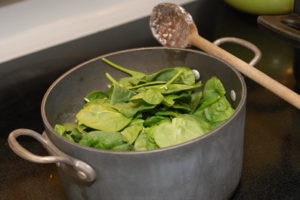
Sautee the onion and garlic in the butter over medium heat until soft. Add the Chevre and break it up in the pot, lowering the heat slightly so it doesn’t burn. Once the Chevre softens, add the milk. When everything is thickened and liquid, add the spices and stir. Lower the temperature to medium-low, add as much spinach as you want and put the lid on it. You want it just below a simmer. Check it every few minutes and turn it off when the spinach is wilted.
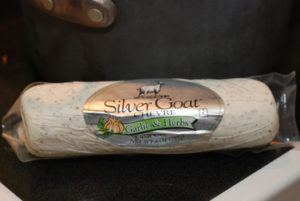
I use both plain and “garlic & herbs” Chevre, depending on what I have in the fridge.
Thickened, melted Chevre and milk with spices on top.
I’m guessing this is 2 cups of spinach, but I cram even more in. Experiment with the amount you like. It practically disappears into the dish!
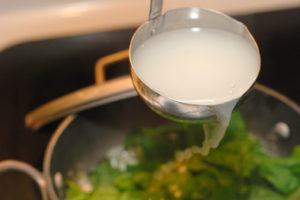
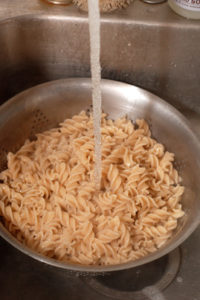
Now, boil the pasta and shred the cheddar cheese. Just before you dump your pasta into a colander, add a ladle-ful of pasta-boiling-water to your cheese mixture (this adds the starch to help the mixture adhere to the pasta when mixed together).
This is a half pound block of cheddar goat cheese from Trader Joe’s. I also will get cheddar goat cheese from Whole Foods and use 7 oz. The dish won’t suffer with more or less cheese.
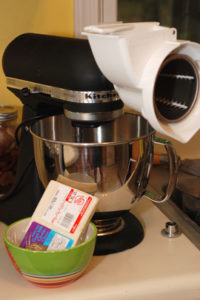
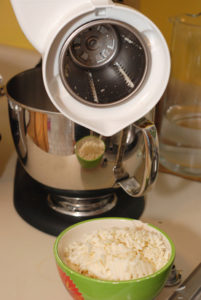
Do you have a Kitchen-Aid mixer? Do you have the grinder attachment? I love it. It shreds a block of cheese in about 30 seconds!
This is the pasta I prefer to use. Cook til al dente so it doesn’t become mushy.
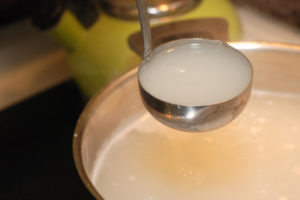
The water is milky because of the starch being released from the pasta. This starch, added to the cheese mixture, will make the mixture “stick” to the pasta instead of sinking to the bottom.
If you forget this step, don’t panic! You can’t go wrong with pasta and cheese. Can you?
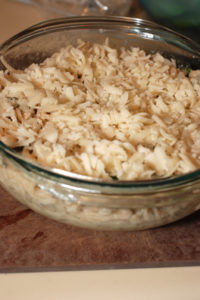
Don’t forget this step… Rinsing your pasta will stop it from cooking and prevent mushiness when everything is combined and baked.
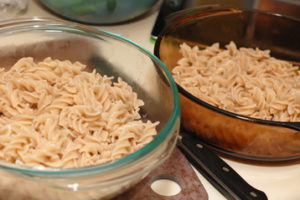
Assemble. Divide the pasta between two casserole dishes. Mix the cheese and spinach mixture into it. Sprinkle the shredded cheddar goat cheese on top. Cover and bake for 20 minutes at 350 degrees.
Divide pasta between 2 casserole dishes.
Stir the cheese mixture into the pasta and sprinkle the shredded cheese on top. Cover and bake at 350 for 20 minutes.
The goodness of this meal is unrivaled in our home! Enjoy!
I can’t say enough good things about quinoa. To me, it is a super food, if you’re into things like that. It’s a great alternative to rice or cous cous. You’ll get good amounts of iron, phosphorous, copper and zinc in quinoa. Quinoa is also high in protein, vitamins B2 and E, magnesium and manganese and it’s technically a vegetable. Yes, a vegetable. I know, right? Its seed is actually related to beets, chard and spinach plants.
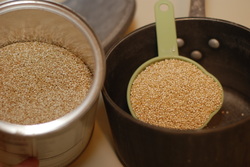
I use regular quinoa, the beige kind you see most often in stores. There are also other colors like red, purple, orange, pink or black! Let me know if you try any of these and if they taste different. I buy the regular kind because it’s found in bulk and if you’re on a budget, like we are, bulk is cheaper!
I should probably mention it’s gluten-free, though that’s a given in our home. I cook it for my family about once a week. I store about eight cups in a sealed container in the pantry and the rest I keep in the fridge or freezer. Do you keep your grains refrigerated or frozen? They stay fresher longer this way, just so you know. I tend to keep containers in the pantry for easy access but only about a month’s worth. The rest is kept sealed in bags in the freezer.
Cooking is simple. Quinoa requires a 1:2 ratio, that is one cup of quinoa to two cups of water; or two cups of quinoa to four cups of water. I usually make two cups at a time. Leftovers are easy to use in a casserole (try this one!) or pizza bites (thank you, Pinterest!) or quinoa-kale patties. I often freeze the leftovers for use in quick recipes later on. Mix your quinoa and water in a small pot, bring to boil, cover and simmer for 20 minutes. The rest is just details… like adding a squeeze of lemon, a pinch of each: salt, pepper, sugar and a pat of butter for extra flavor. Adding minced or powdered garlic is a favorite here too. Once you make the regular quinoa, you’ll find you can do so much with it!
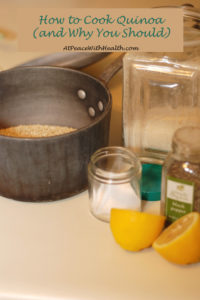
My go-to supplies for making quinoa: lemon, salt, pepper and sugar
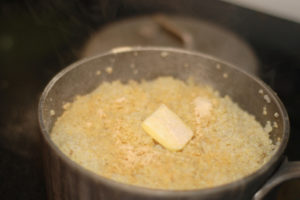
The finished product with a pat of butter and a few sprinkles of garlic powder. It’s hot, light and fluffy!
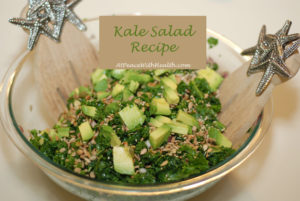
If I were in the mood for poetry, I would write an Ode to Kale, or a Kale Salad Haiku… yes, that’s how much I Love Kale. Do you love kale? Do you hate it? Have you tried it? Have you tried it like this?
This recipe is adapted from a photocopied, scanned recipe e-mailed to me many years ago by a friend who’d made it for dinner one night. My husband and I were immediately hooked. We average one kale salad a week and when we make it we go big! It’s one of those foods that we feel healthier when eating. When we’ve been away for a couple of days and had take-out or less than appealing choices, we come home and make kale salad. It’s that healing.
What if I told you that kale is so full of nutrients your body will thank you for eating it? Vitamins B1, B2, B6, C and E are prevalent in it. It also has significant amounts of carotenes, manganese, calcium, chlorophyll, copper and iron. As a part of the cabbage family, kale has anti-cancer properties. Are you getting how incredible this food is and why it should be a part of your life? I shouldn’t say, “should”… I mean I want you to want it, to try it, to love it, but if you don’t, it’s okay. Life will go on. Throw some in a smoothie every once in a while and continue to enjoy your life.
No matter how healthy I tell you it is, if you haven’t had kale prepared in a delectable way, there will be no convincing you. The first time I saw kale was in a CSA produce box and I tried it raw, I tried it steamed, I tried it sautéed… I hated it. This recipe, while raw, breaks down the kale with the citrus and salt so it is tender and flavorful, not bitter and dry. The seeds add crunch while the avocados make it creamy. I kinda want it right now, but I’m not even hungry!
Try this recipe. Tell me what you think. Tell me it changed your thoughts about kale, please! If you want, tell me it changed your life too! Recipe for Kale Salad
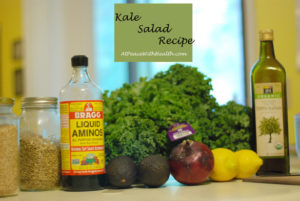
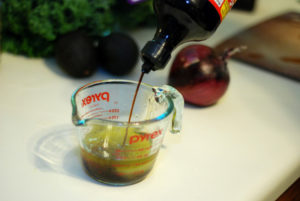
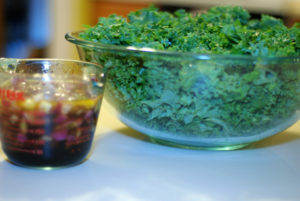
Dressing: ¼ c fresh squeezed lemon juice ¼ c olive oil ¼ c Bragg’s liquid aminos ¼ of a red onion, chopped (or more if you really like onions)
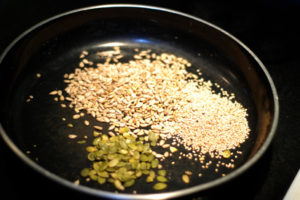
Salad: 2 bunches of kale Toppings: 2 ripe avocados 1/8 c each: sunflower seeds, sesame seeds, pumpkin seeds (all toasted)
Make your dressing first. Combine the first three ingredients in a measuring cup and add the onions to it to marinate. Then, start toasting the seeds in a saucepan or frying pan on medium-low (about 8-10 minutes). If they start popping they’re done. While the seeds are toasting, chop the kale, discarding the stems. Throw it in a salad spinner, wash and spin dry.
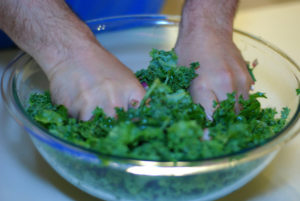
To assemble, pour the dressing over the kale and massage deeply. Then massage some more. Massage until the leaves are bright green, shiny and reduced in volume. Sprinkle with seeds. Cut up the avocados and place them on top. Serve room temperature or cold. (I like mine chilled first. My husband likes his room temp. To each their own.)
Visual step-by-step (with the help of my husband) follows:
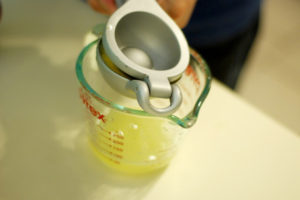
Juice the lemon. Do you have a lemon squeezer? If you don’t, don’t let it stop you! We didn’t have one until recently. It makes things a lot easier but it’s not imperative.
Add the olive oil
Add the Bragg’s – do you have Bragg’s? Do you know what it is? More on this subject later, but it is found in most grocery stores with a health food section. Check by the ketchup, vinegar, salad dressings and other condiments.
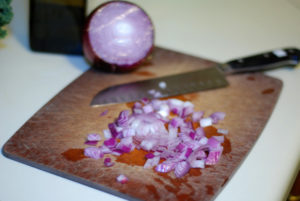
Chop your red onion. The size of the pieces is really personal preference. When I first had this salad, the onion was in half moons. My husband prefers smaller pieces and I don’t care, so that works!
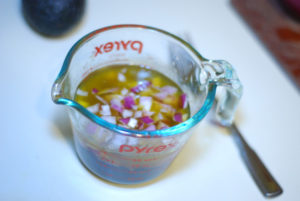
Add the onions to the dressing, stir and let sit until you’re ready to assemble your salad.
Note: amount of pumpkin seeds here is not exact. I ran out. There, I said it. My salad didn’t suffer, but I prefer equal ratios.
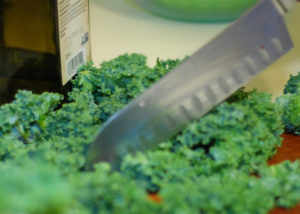
Chop, chop, chop that kale. This is my least favorite part. Maybe you have a super-awesome spouse who will do this part for you!
Wash and dry that kale! If you don’t have a salad spinner, this is where the recipe would say, “Wash kale and pat dry.” I’ve never actually done this, but the salad spinner is a really useful tool for the kitchen.
See the volume of kale in our giant mixing bowl? Prepare to be amazed as it shrinks before your very eyes.
Massage. Massage. Massage. I can’t stress this enough. My husband is really good at this part, thankfully! In fact, he’s really good at making the whole salad himself!
I’m a carefree woman. I love to laugh, sing, eat, play, cook, dance and make memories. I haven’t always been this person, though. And while I love my life, I have deep sadness for what I have been through.
Can I tell you a piece of my story? Without boring you with the year-by-year play-by-play, I’ll sum it up like this: From the time I was a teenager I had hang-ups about my weight. Not so strange for a teenager, you say. Not so weird for a girl, especially, right? It only got worse. Those hang-ups became motivating factors for these games I would play with myself; games that ultimately would lead me to lose weight (ah, the end justifies the means…). Whether calorie-counting, exercise-purging, starvation or other neurotic eating habits, I mastered the latest obsession with my Type-A personality and perfectionism by my side. I’ve been 98 pounds as an adult. I’ve also been 150 pounds as an adult. My roller coaster consumed me. My control soothed me. Can you relate? I promise you: dieting is not your friend.
I have to take a deep breath and remind myself that I’m not her anymore. What a relief! My sense of self was completely wrapped up in my weight, my looks, my size. How much energy I wasted on controlling my every move, bite, calorie and pound! Now, things are different and I’m thankful every day for the freedom I experience. I don’t own a scale. I am not concerned with the size of my clothes. I don’t count calories or fat grams or carbohydrates. I don’t restrict anything! I don’t work out like my life depends on it. In fact, I don’t work out at all. That sounds like too much work to me. I’m thin, active, healthy and vibrant. I’m living, not striving.
I wish I could give you a formula for what changed, but I can’t. It’s different for everyone, although I’ve pin-pointed a few key factors. I’ve learned how to eat intuitively. What I want. When I want it. I’ve learned to not eat if I’m not hungry. I’ve learned which foods agree with me and make me feel my best and which don’t serve me well at all. I’ve learned to find purpose and meaning in things far more incredible than food, weight, weight-loss and exercise. Sound good? Please, contact me if you want to know more. My program is unique, life changing and empowering. Honest.
All of this would mean nothing if I hadn’t learned the power of a story. My story. Stories others tell about me. Stories the world tells about beauty, women, sex-appeal and love. Stories are everything. If you think about it, really think about it, everything you believe is a story. What stories revolve around you, your health, your life, your purpose, your worth and your beauty? Think of facts that you know to be facts and then ask yourself how you know them to be true… it’s mind-boggling. Using narratives in healing is a way of looking inside a person to find out what their body and mind think about their illness, health, and life. Stories run deep in our body’s cellular understanding, so it makes sense that we would be operating under the rules that our particular narrative is providing for us in any given situation.
In order to experience these transformations, I had to experience deep healing. Healing is really a way of viewing a situation from a larger perspective that allows for growth where once we saw only stagnation, illness, disease, or death. When I refer to healing, I am not talking about a miraculous recovery from a disease, though this is possible; nor am I speaking about a cure. I am referring instead to the delicate balance of appreciation for life, living life to the fullest, and considering one’s purpose, as well as the purpose of whatever challenge one is facing. Change and healing lead to transformation and are journeys, not destinations. They are processes of growth to aid us in living lives of quality and depth. Change is never permanent and healing is not a cure. With these concepts in mind, consider how much hope is restored when we are no longer looking for a specific outcome but are focused on the power of the process, knowing that healing is inevitable.
Change asks us to aim for the healing, not the cure, to live for the journey, not the elusive destination. There is a huge difference between healing and cures, journeys and destinations; it is an issue of quality. Taking a journey can be likened to an adventure, one that is filled with mystery and purpose. Change is such a journey.
I’d love to hear about the changes you want to experience, the journeys you want to take. I’ll also be thinking about the changes I am trying to embody myself; changes that will redefine who I am and how I live. I love how endless the possibilities are, don’t you?


 Change asks us to aim for the healing, not the cure, to live for the journey, not the elusive destination. There is a huge difference between healing and cures, journeys and destinations; it is an issue of quality. Taking a journey can be likened to an adventure, one that is filled with mystery and purpose. Change is such a journey.